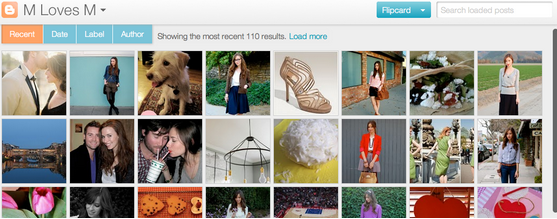
Hello everyone today morning when i was going through one of my friends blog JD SONS I found an amazing template this is,his new HTML template intended upon magazine style layout. You can see the demo of the template and check its cool features.
Showing posts with label blogging tutorial. Show all posts
Friday, 4 November 2011
New HTML magazine template TIMES PRESS
Hello everyone today morning when i was going through one of my friends blog JD SONS I found an amazing template this is,his new HTML template intended upon magazine style layout. You can see the demo of the template and check its cool features.
Monday, 4 April 2011
Follow By Email Gadget for Blogger
Many blog readers prefer to receive updates of new posts by email (rather than subscribing in an RSS feed reader). To make it even easier for our readers to stay in touch with our sites, the Blogger Team have developed a new, official gadget: Follow by Email.Recently Blogger has added a new Gadget/Widget to its ever improving list of blogger gadgets. They call it Follow By Email.
To add this Gadget, Follow these simple steps
1. Login to your Blogger Dashboard, Navigate to Design > Page Elements tab and click on the “Add a Gadget” Link
2.On the next window click on the plus sign, and you will be taken to the gadget options page.
3. Click the save Button and you are done.
You are done now!! :) Wasn’t that simple?
Friday, 1 April 2011
Blogger introduce Different views to present your content
Blogger now offers you the ability to present your content in several new and exciting ways.

These dynamic views will work on your blog if all of the following are true:
If any of the above conditions are not true, users who attempt to access dynamic views for your blog will instead be taken to a landing page and redirected to your original blog in a few seconds.
If all of the above conditions are true, your readers can access the dynamic views for your blog by simply appending /view to the URL.
for ex check out the different views of technowitcheck out this video tutorial
Monday, 21 March 2011
What’s New With Blogger
Earlier in 2010 Blogger has added to many new features like new Template designer ( enables to create templates without any knowledge of HTML/CSS ), different fonts where added, stats option,comments filtering etc.
And now in 2011 blogger has previewed some of the features on http://buzz.blogger.com/that will be launched. Some of these features which blogger has allowed its users to sneak peak are:-
1. New look of dashboard – See the screenshot of new blogger dashboard

[Open in new window to see a large view]
2. New post editor -

[Open in new window to see a large view]
See this video to have a better idea
Thursday, 24 February 2011
Search box with hiding text
While surfing through many blogging resource websites I found many tutorials that explained how to create a search box with default text inside the input but that text didn’t hid itself whenever the input was clicked for typing.
But recently I came across the website of one of our reader’s jdsans which had this tutorial to create a search option with text hiding capability on clicking. The widget works perfect in HTML/JavaScript widget option but it doesn’t work in the template code area. But I removed that bug so this widget is perfect to work on both the places.
Unfortunately there are two different codes for both the above purposes.
1. If you want to install the search box in HTML/JavaScript widget use this code
<form id="searchThis" action="/search" style="display:inline;" method="get"><input id="searchBox" name="q" size="20" type="text" value="Search This Blog...." onfocus="if(this.value==this.defaultValue)this.value='';" onblur="if(this.value=='')this.value=this.defaultValue;"/> <input id="searchButton" value="Search" type="submit"/></form>
2. If you want to use the search box in the template code use this one:-
<form id="searchThis" action="/search" style="display:inline;" method="get"><input id="searchBox" name="q" size="20" type="text" value="Search This Blog...." onfocus="if(this.value==this.defaultValue)this.value='';" onblur="if(this.value=='')this.value=this.defaultValue;"/><input id="searchButton" value="Search" type="submit"/></form>
In both the codes above 20 represents the box size and “Search this Blog…” represents the default text that will be seen in the input area. You can change both these values as you like.
Tuesday, 15 February 2011
Link Exchange Service
While browsing sites for getting free traffic to my blog, I found a very interesting but doubtful site called binary traffic dot com, So i decided to write about and check wheter it is possible to get real traffic from this site and I signed up to just test it.
Lets see what the webmaster of the binary traffic site want to say about it:
Webmaster of Binary Traffic Dot Com says: Do you want lots of web traffic? Then you better read this!
We can make web sites with tons of traffic and hits, we have sites with #1 positions on Google (TM), we have many domains names and generate several million dollars a year from web based businesses. We even know what your thinking! You think we are arrogant. Well we don't care, we know how to make sites big on the interent and if you want to be a sucess too then we can help. In business it is all about money and the first rule for web business is: "Web traffic = Money"
I think that it really works and is a good tool for all the bloggers for creating backlinks...
Lets Start adding our blog and website links below to check it:
ALSO SEE:SET REMINDER FOR YOUR VISITORS
Sunday, 16 January 2011
Social widget for posts with all social buttons with count
In this post I going to tell you how to install a simple social widget inside the posts having generally used social buttons with counters.
You can see the screenshot of the the widget above. Follow the below steps to install it.
Step 1. Go to your template code dashboard>>design>>edit HTML. Now click the box named Expand widget template. Search for ]]></b:skin> and paste this code above it.
.social-bar { border: dashed #ddd; border-width:1px 0 1px 0; margin: 10px auto 10px; display:block; padding: 3px 0 1px 0px; overflow: hidden; }
.social-bar .social_button {float: left; display: inline; overflow: hidden; height:22px; }
.social-bar .social_button.dg { margin: 0px 0 0 20px ; padding-top: 2px;}
.social-bar .social_button.tm { margin: 0px 0 0 20px; padding-top: 4px;}
.social-bar .social_button.fb { margin: 0 0 0 20px; padding-top:3px;}
.social-bar .social_button.su { margin: 0px 0 0 20px; padding-top: 2px;}
.social-bar .social_button.buzz { margin-left:20px ; padding-top: 3px;}
Step 2. Now find this code <div class='post-header'> and paste this code below it.
<b:if cond='data:blog.pageType == "item"'><div class='social-bar'><div class='social_button dg'><a class='DiggThisButton DiggCompact'/><script src='http://widgets.digg.com/buttons.js' type='text/javascript'/></div><div class='social_button tm'><div style='float:right;width:90px;height:25px'><a class='twitter-share-button' data-count='horizontal' data-via='technowit' href='http://twitter.com/share'>Tweet</a><script src='http://platform.twitter.com/widgets.js' type='text/javascript'/></div></div><div class='social_button fb'><iframe allowTransparency='true' expr:src='"http://www.facebook.com/plugins/like.php?href=" + data:post.url + "&layout=button_count&show_faces=false&width=100&action=like&font=verdana&colorscheme=light"' frameborder='0' scrolling='no' style='border:none; overflow:hidden; width:80px; height:27px;'/></div><div class='social_button su'><script src='http://www.stumbleupon.com/hostedbadge.php?s=1'/></div><div class='social_button buzz'><a class='google-buzz-button' data-button-style='small-count' href='http://www.google.com/buzz/post' title='Post to Google Buzz'/><script src='http://www.google.com/buzz/api/button.js' type='text/javascript'/></div></div></b:if>
Save the template and its done.
The above hack is for the widget to appear in the head. But if you want it to appear in the footer then search for <div class='post-footer-line post-footer-line-1'> or <div class='post-footer-line post-footer-line-2'> or <div class='post-footer-line post-footer-line-3> and paste the code in step 2 below any of those three.
Subscribe to:
Posts (Atom)